


Todos os Produtos
-
 Bruno NascimentoObrigado pela sua ajuda e apoio contínuos para nos fornecer produtos de alta qualidade e acessíveis.
 -
 Ehsan SalmariA resposta rápida e a atitude profissional tornam a nossa cooperação mais suave!
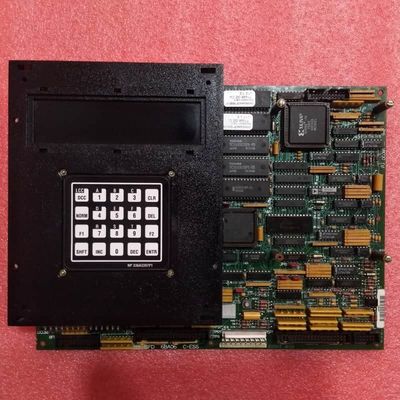
Cartão de controle de acionamento da série GE Mark V com 200 mm de altura 100 mm de largura e 1 ano de garantia para sistemas de controle de turbinas


| Lugar de origem | EUA |
|---|---|
| Marca | GE |
| Certificação | COO |
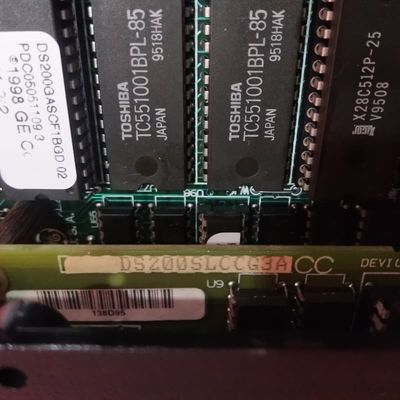
| Número do modelo | DS215GASCG4AZZ01A (DS200SDCCG4AEC+DS200SLCCG3ACC) |
| Quantidade de ordem mínima | 1 |
| Preço | $1500 |
| Tempo de entrega | 5-7 dias |
| Termos de pagamento | T/T. |
| Habilidade da fonte | 999 |
Detalhes do produto
| Nome | GE DS215GASCG4AZZ01A (DS200SDCCG4AEC+DS200SLCCG3ACC) Cartão de controle | ID do produto | DS215GASCG4AZZ01A (DS200SDCCG4AEC+DS200SLCCG3ACC) |
|---|---|---|---|
| Série | Mark v | Peso líquido do produto | 2kg |
| Profundidade líquida do produto/comprimento | 330mm | Altura líquida do produto | 200 mm |
| Largura líquida do produto | 100mm | Garantia | 1 ano |
| Destacar | Cartão de controlo do motor de 200 mm de altura,Tabela de controlo de tração de largura de 100 mm,Cartão de controlo da turbina de 1 ano de garantia |
||
Descrição de produto
O sistema deve ser equipado com um sistema de comando de transmissão, que permita a utilização de um dispositivo de transmissão de transmissão de transmissão de transmissão de transmissão de transmissão de transmissão.
Visão geral do produto
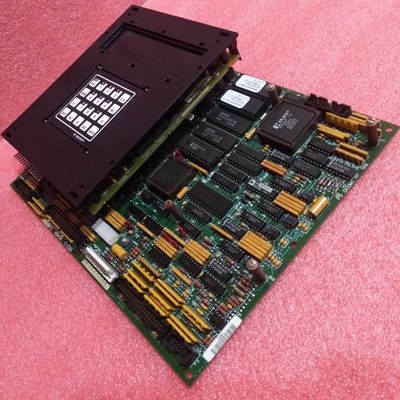
O GE DS215GASCG4AZZ01A ((DS200SDCCG4AEC+DS200SLCCG3ACC) é um painel de controle de acionamento central projetado para sistemas de acionamento industrial, provavelmente integrado com o Mark V Turbine Control System da GE.Este cartão de controlo avançado tem três microprocessadores especializados:
- Processador de controlo de unidade (DCP):Gerencia tarefas de nível de sistema, incluindo decodificação de seleção de chips, acesso direto à memória (DMA) e controle de interrupção
- Processador de controlo do motor (MCP):Gerencia funções específicas do motor
- Processador de co-motores (CMP):Processar tarefas de matemática intensiva além da capacidade do MCP
Características fundamentais
- Funcionalidade expansível:Suporta cartões LAN e processadores de sinal opcionais para diversas necessidades de comunicação e processamento de sinal
- Diagnóstico intuitivo:Painel frontal de 10 LED com codificação de falhas BCD/binária permite a identificação rápida de problemas
- Hardware configurável:Os saltadores JP/WJ de fábrica garantem a compatibilidade com a flexibilidade de ajustes do utilizador
- Design robusto:A RAM compartilhada permite o acesso simultâneo de vários processadores para uma operação eficiente
- Instalação segura:Inclui obstáculos, compatibilidade de lavadora de nylon e diretrizes de transferência EPROM
Instalação e manutenção
Para instalação/substituição segura:
- Desligar todas as fontes de alimentação antes da instalação para evitar eletrochoques
- Remover os cabos das placas auxiliares e parafusos de fixação antes de retirar a placa
- Transferir os módulos EPROM da placa defeituosa para a unidade de substituição
- Use lavadoras de nylon de fábrica para evitar danos nos parafusos durante a montagem
- Certifique-se de que os suportes de plástico estão bem apertados
Nota: Todas as especificações e características estão sujeitas a alterações sem aviso prévio.
Produtos recomendados
-
VIDEO
